
Installing a WPC Garden Fence presents a surprisingly straightforward and rewarding DIY project. Even beginners can achieve success. This guide walks readers through every step. It ensures a beautiful and durable WPC garden fence with ease.
Key Takeaways
- Plan your WPC Fence project carefully. Check local rules and mark utility lines before you dig.
- Install fence posts correctly. Use concrete for stability and make sure posts are deep enough.
- Assemble WPC Panels securely. Use the right screws and follow the steps to build a strong fence.
Preparing for Your WPC Garden Fence Installation
Successful installation of a WPC garden fence begins with thorough preparation. This phase ensures a smooth process and a durable, aesthetically pleasing result. Proper planning and gathering the right resources prevent common pitfalls and contribute significantly to project success.
Essential Tools and Materials for Your WPC Garden Fence
A well-equipped toolkit and the correct materials are fundamental for any fencing project. Installers require specific items to handle WPC components effectively.
Essential tools include:
- Post Hole Digger: This tool creates deep, narrow holes for securely placing fence posts.
- Garden Spade: A spade assists in digging and removing soil, preparing the ground for posts.
- Heavy Duty Tape Measure: Accurate measurements are crucial for consistent post spacing and panel alignment.
- Spirit Level: This ensures all fence posts and panels remain perfectly level and straight during installation.
- Cordless Combi Drill: A drill is indispensable for creating pilot holes and driving screws to secure components.
- Additional Screws: Always have extra screws on hand for fastening fence panels and posts.
- Timber Battens: These temporary supports hold fence panels in position while securing them.
- Bucket: A bucket proves useful for mixing concrete or transporting smaller materials.
The necessary materials for a standard WPC garden fence installation typically include:
- WPC fence panels (pre-measured and cut to project specifications)
- Fence posts
- Concrete mix or post anchors for securing posts
- Rubber mallet for gentle adjustments
- String line for establishing straight fence lines
- Shovel or post hole digger (as mentioned above)
Planning Your WPC Garden Fence Layout
Careful planning of the fence layout prevents costly errors and ensures compliance with local regulations. Property owners must consider several factors before digging begins.
First, always consult local zoning laws and regulations. Municipalities often have specific rules regarding fence height, style, and placement. For instance, areas like St. Louis County and its various cities enforce distinct requirements. Obtaining necessary permits from the local municipality is a critical step before starting any work. Permit acquisition times vary, typically taking 5-10 business days depending on location and project complexity.
Second, property line considerations are paramount. Missouri law generally dictates that boundary fences sit directly on the property line unless neighbors agree to an alternative arrangement. Incorrect placement can lead to legal disputes. Some regions also have specific laws regarding shared fence costs and maintenance, such as Missouri’s General Fence Law versus Local Option Fence Law.
Third, understand specific installation requirements. For example, in many regions, fence posts must extend below the frost line, often around 30 inches deep, to prevent frost heave damage. Design standards also apply; some areas prohibit certain materials like paper or cloth, or restrict chain link fences in front yards. Finished fence surfaces typically must face outward, with posts and cross members facing inward. Height limitations also vary significantly; a rear yard might allow a 6-foot fence, while areas near street intersections could restrict fences to 2 or 4 feet.
Safety First for Your WPC Garden Fence Project
Prioritizing safety protects installers and prevents damage to underground infrastructure. Every fencing project requires adherence to safety protocols.
A mandatory step involves scheduling utility location services. Services like the Missouri One Call System (Dig Rite) mark underground utilities before any digging commences. This typically requires a 72-hour notice before work can begin. Striking underground power lines, gas pipes, or water mains poses significant hazards and can result in severe injury or costly repairs. Always confirm utility lines are marked and understood before breaking ground. Additionally, wear appropriate personal protective equipment, including gloves and safety glasses, throughout the installation process.
Step-by-Step WPC Garden Fence Installation Guide
Installing a WPC garden fence involves a systematic approach. Each step contributes to the overall stability and aesthetic appeal of the final structure. This guide provides a clear pathway for successful installation.
Setting Up Your WPC Garden Fence Posts
Proper post installation forms the foundation of a durable WPC garden fence. This crucial step ensures the fence remains upright and stable for years.
First, contact utility location services, such as PA One Call, three days before digging. This ensures public utilities are marked, preventing accidental damage. When digging post holes, use post hole diggers and a digging/tamping bar for easier excavation. For posts measuring 4″x4″, 5″x5″, or 6″x6″, install them at least 30 inches underground. This depth prevents heaving from ground freezing. Dig a cylindrical hole 4 inches wider than the post. This allows sufficient space for tamping soil without moving the post. Place excavated soil in a single pile next to the hole for easier backfilling. Measure 30 inches from the bottom of the post and mark it. This ensures proper burial depth. Tamp small amounts of soil around the post with a tamping bar, checking for plumb, until all soil returns. Consider mixing a small amount of premix concrete with the soil to ‘stiffen’ it, using two full shovels per hole. Alternatively, dig a hole 80 to 90 cm deep and at least 20 cm wide for each post. Place the aluminum garden post level in the hole. Use the sand-water-sand method or a special pile-fixed filler for firm anchoring. This avoids the corrosive effects of traditional concrete on aluminum. Allow everything to harden thoroughly before proceeding with assembly.
Concrete footings are strongly advised for both metal and wood posts. This applies particularly to privacy fences or in challenging soil conditions like soft, wet, or shifting ground. Concrete ensures posts remain upright and stable. It also protects the base of the posts from moisture. Fast-setting concrete is highly recommended for setting posts. It does not require pre-mixing. Simply pour the dry concrete into the hole and add water. It sets quickly, typically within 20 to 40 minutes. This allows for faster project progression. Posts can bear heavy weight after just 4 hours under normal curing conditions. To secure WPC fence posts, use concrete. After positioning the posts straight, mix the concrete according to the manufacturer’s instructions. Pour it into the holes around the posts to hold them in place.
Assembling WPC Garden Fence Panels
Assembling the WPC garden fence panels involves attaching them securely to the installed posts. This process builds the main structure of the fence.
Begin by cutting the corner brace and rail to match the intersection angle. Insert the corner brace into the rail. Secure the bottom rail, with the corner brace attached, to the post using screws. Ensure the ‘A’ side of the rail is close to the ‘B’ side of the post. Position it with a U-rail. Place the fence board into the U-rail’s groove. Slide both parts through the post’s groove down to the bottom rail. Fix its position with the U-rail. Fasten the U-rail to the post with 2 or 3 screws. Continue installing fence boards as per the standard installation guide. Repeat these steps to install the top rail, ensuring the corner brace faces upwards. Install any remaining accessories according to the regular installation guide. Fasteners specifically designed for WPC fence panel assembly include screws for mechanical connections like post bases and angle brackets. Expansion screws are used for post base fixing. Set screws secure other components. Color-matched decorative head screws offer aesthetic integration. Stainless steel screws are recommended for outdoor environments to prevent rust. L brackets and hidden clips also serve as essential components for secure assembly.
Finishing Touches for Your WPC Garden Fence
The final steps involve adding decorative elements and ensuring long-term protection for your WPC garden fence. These touches enhance both appearance and durability.
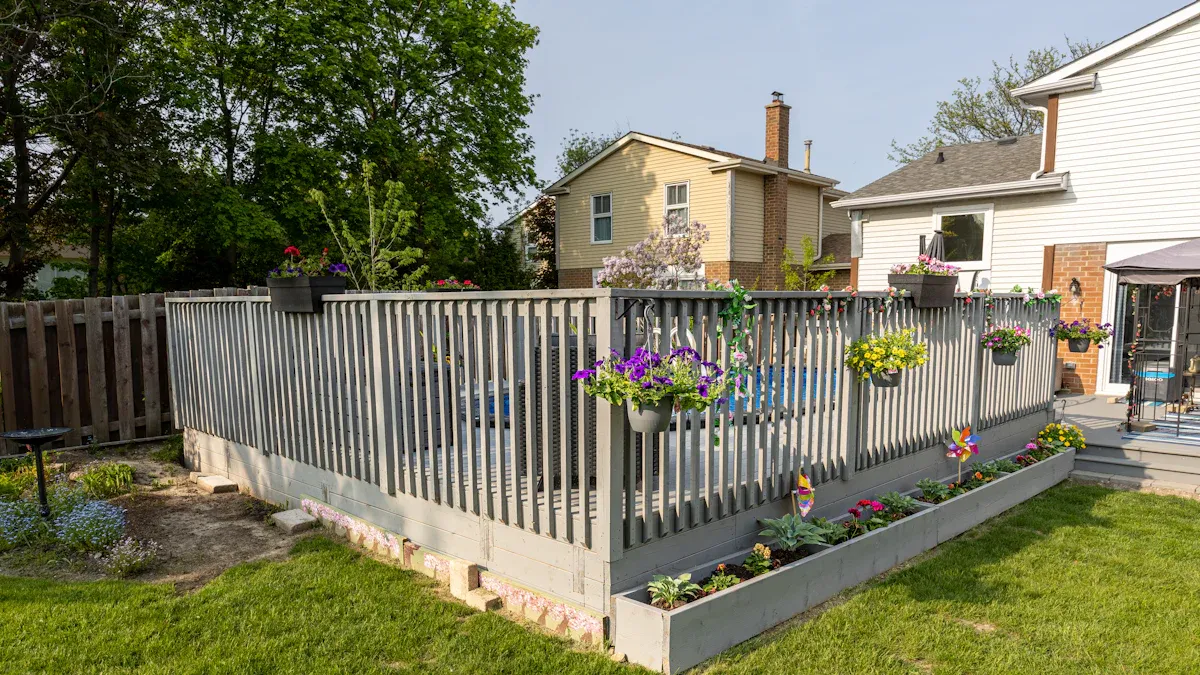
A cap and trim fence utilizes a top cap and lower trim boards. These cover and support the pickets, offering improved durability and visual appeal. The top cap is a horizontal board. It covers the top of the pickets, protecting them from moisture and creating a clean finish. Trim boards are lower horizontal boards. They add support and balance to the fence design. Popular upgrades include decorative post caps, lattice tops for more height and visual interest, and boxed-in posts for a column-style look. Install caps or decorative trims to enhance appearance. They also protect the fence from water infiltration. Options include aluminum casting cap railing fence post caps, high pyramid fence pressure-treated wood post caps, and various plastic or metal caps. These caps come in different styles, such as pyramid, flat, or round ball designs. They offer both aesthetic appeal and functional protection against the elements.
Tips for a Smooth WPC Garden Fence InstallationDouble-Checking Measurements for Your WPC Garden Fence
Accuracy ensures a successful installation. Installers must verify all measurements before cutting or digging. Double-checking post distances and panel dimensions prevents errors. This step saves time and material. A precise layout contributes to a professional-looking final product.
Working with a Helper for Your WPC Garden Fence
Enlisting assistance significantly eases the installation process. A helper can hold posts plumb while another secures them. They can also assist with lifting and positioning panels. Two sets of hands make tasks like string line setup and concrete mixing more efficient. Collaboration ensures safety and speeds up project completion.
Maintaining Proper Spacing for Your WPC Garden Fence
Correct post spacing is crucial for fence stability. WPC fencing, a composite material, allows for wider post spacing due to its durability. A common guideline suggests placing posts every 180–240 cm (6–8 ft). Pre-assembled fence sections, typically 6 or 8 feet long, dictate post alignment. Factors like loose soil, taller fence designs, and areas prone to high winds or heavy snow may require closer post placement. Heavier panels also influence spacing decisions.
Cleaning and Maintenance for Your WPC Garden Fence
Regular cleaning and maintenance preserve the appearance and longevity of your wpc garden fence. For most dirt, a solution of mild dish soap and warm water works effectively. For mold or mildew, use a white vinegar mix (1 part vinegar to 3 parts water). Avoid high-concentration bleach, steel wool, or pressure washers above 1,500 PSI. Rinse the fence seasonally with a garden hose (40-60 PSI) to remove dust. Quarterly, clean with a garden hose (pressure ≤ 1500 PSI). Annually, inspect the coating and perform a comprehensive cleaning with mild soap. Conduct a thorough structural inspection twice a year.
Readers have successfully installed their own WPC garden fence. This enhances their outdoor space with durability and style. They can now enjoy the long-lasting beauty and low maintenance of their new fence. This DIY project proves that a professional-looking WPC garden fence is well within reach for anyone.
FAQ
What is WPC material?
WPC (Wood Plastic Composite) blends natural wood fibers with recycled plastic. This material offers durability, moisture resistance, and the aesthetic appeal of wood.
How long does a WPC fence last?
WPC fences offer exceptional longevity. They typically last 15 to 25 years or more. This depends on environmental conditions and proper installation.
Is WPC fencing environmentally friendly?
Yes, WPC fencing is environmentally friendly. Manufacturers use recycled wood and plastic, reducing waste. This aligns with sustainable development goals.
Media Contact
Company Name: Ningbo Yida Wood Plastic Technology Co., Ltd.
Email: Send Email
Country: China
Website: https://www.ydwpcfactory.com/